"Cupcakes Make Everything Better" - That's the t-shirt Sweet Cheeks gave me for Christmas last year. I wore it on my way home from Houston and the TSA agents couldn't agree more. Sit back and think on that for a moment. Is there anything cupcakes couldn't make better, even if it's just a little bit? I am drawing a monumental blank.
When we decided on what to do for Easter, colorful cupcakes came up. The idea of making poppers (basically two small cupcakes with icing in the center) seemed even better because they just looked fun. I was mentally planning my shopping list when I thought that flavored poppers would be even better. So off to the store I went, and I picked up preserves that coordinated with the colors I planned: raspberry for pink, blueberry for blue, blackberry for purple, and yellow... well they don't really make lemon preserves (at least not in my neck of the woods), so I settled on lemon extract. *I would like to take a moment to warn you that when you use lemon extract, or extract of any kind, that is past the expiration date, they tend to become less extract and more flavored rubbing alcohol.
My sister came home after I had finished up and she told me that she grabbed one and got really excited when it was flavored like the color. She said she had to try them all. I have to agree, you can't just eat one and they are the perfect size for a quick snack. Then again, if you are like me, one becomes three and then you're no longer hungry for lunch. I hope you enjoy them as much as I did and that they brighten up your Easter baskets!
Babycakes
CUPCAKES
YOU WILL NEED:
1 c. (2 sticks) softened butter
2 c. granulated sugar
4 room temp. eggs (soak cold eggs in bowl of warm water for a few minutes to warm them up)
1 1/2 c. self-rising flour
1 1/4 c. all purpose flour
1 c. milk
1 tsp. vanilla
food coloring of your choice
PREPARATIONS:
1. Preheat the oven to 350 degrees.
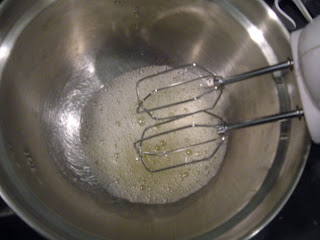
2. Beat the butter until it is fluffy. Add the sugar gradually and mix until creamy. Add eggs one at a time, mixing thoroughly after each addition.
3. In a separate bowl, sift together the two flours. Add 1/3 of flour mixture to butter mixture.
4. In another separate bowl, combine vanilla and milk. Pour 1/2 of milk mixture into butter mixture. Add another 1/3 of the flour and mix well. Pour in the remaining milk and vanilla and beat completely. Finally add the last of the flour mixture and beat until completely incorporated.
5. If you'll be using more than one color, separate the mixture into as many bowls as there are colors. Add the desired amount of food coloring to each bowl. If you want more vibrant colors, add about 8 drops each.
6. Grease the bottoms and sides of each cup in a non stick muffin tin. You will not be using cupcake liners!
7. Drop a small spoonful into the bottom of each muffin tin. It should be just a small dollop so that the finished product does not puff up too much. For a tye dyed look, use half a spoonful of two different colors, swirl but do NOT mix. It's okay if you can still see the bottom of the pan because the batter will spread out as it bakes.
8. Bake for 8-10 minutes, checking around the 8 minute mark to make sure they do not burn.
9. Pop them out with a small spatula onto a cooling rack.
ICING
YOU WILL NEED:
1/2 c. softened butter
5-7 c. confectioner's sugar
1/2 c. milk
2 tsp. vanilla
2 tbs. blueberry preserves
2 tbs. raspberry preserves
2 tbs. blackberry preserves
1 tsp. lemon extract
food coloring
PREPARATIONS:
1. Beat butter and 4 c. confectioner's sugar.
2. Add milk and vanilla and beat until fully mixed.
3. Add the remainder of the powdered sugar by the cup until it has reached a slightly stiffer consistency than you would like.
4. Separate the icing into four bowls. Add each preserve or extract to one bowl each. Taste each icing to make sure that you can taste the various flavors. If it isn't strong enough for you, add more a little at a time.
5. Add the food dye to each bowl to match the colors that the cupcakes will be. We used purple for blackberry, blue for blueberry, pink for raspberry, and yellow for lemon.
ASSEMBLY
Once the cupcakes have cooled, put a dab of icing (we matched the colors but you can mix and match to make the flavors a surprise) on the flat side of each cupcake and place it on another cupcake (bottom to bottom) so you have a sandwich. Enjoy!


